When I aquired my dual slice Risc PC 600 I found that the previous owner had wiped the hard disc.
This wouldnt normally be a problem with RiscOS as everything is is ROM. Well the truth of the matter
is RiscOS 3.5 didnt have everything in ROM, and relied on some software being on the hard disc, noteably
the Apps directory and that most useful little utility called !Configure.
Firstly, I sourced a copy of !Hform from the net, copied it to floppy disc and used this to totally reformat
the hard disc. !Hform asks you lots of questions regards your particular disc, just choose all the defaults.
Next from another machine linked to the internet, go the the Acorn Legacy FTP site
and download the Disc Archive for Version 3.5, this should be in two files labeled part1.arc and part2.arc
Next you will need a copy of !Sparkplug to decompress these files, so here it is.
If your downloading all this on a Windows PC then transfere everything to a couple of floppy discs.
The RiscPC is capable of reading DOS formatted discs so there will be no problem.
Next on the RiscPC, open the filer window for the hard disc, is should be completely empty.
Create a new directory and call it something like "Temp". Into this copy the entire contents of our floppy discs.
Double clicking on the dearchive.bas file should create a nice little !Sparkplug icon.
You may also need a copy of !Scrap and !System in this directory as well. This is easily sourced.
Next double click on the !Sparkplug icon, the aplication will now appear on the iconbar.
Drag the part1.arc file onto the !Sparkplug icon on the iconbar. A window will open up showing the contents
of this archive. Drag the entire contents to the "Root" directory of your hard disc, NOT the Temp directory.
When done close the archive windows and repeat for the part2.arc, dragging all contents to the Root directors again.
Next, close all windows, then press F12. This will open the "Command Line" at the bottom of the screen.
Now ensure that the Hard Disc is "bootable" by typing *OPT 4,3 and pressing RETURN twice will take you back to
the desktop. Note, there is already a "*" at the command line so you only need to type "OPT 4,3"
Finally, re-boot the machine, by middle clicking on the Acorn, select Shutdown, then click on Restart.
The machine should re-boot and have the Apps Directory visible on the iconbar.
Open the Apps directory and select !Configure to set any display or Mouse speed setting that you want.
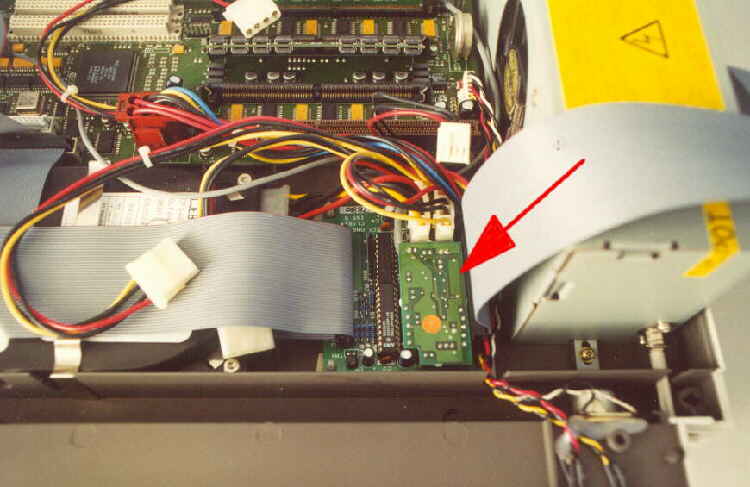
If you have an "older" system like mine that still uses the old Cumana CD-ROM drive with Panasonic interface,
this can be identified by the little extra circuit board on the internal IDE interface, see below.
Then you will require this driver file.
Copy this archive to the same "Temp" directory. Start the !Sparkplug application again and drag this 106.arc onto it.
Open up your !Boot folder by holding down SHIFT and double clicking it, then open up the
subfolders Choices, Boot, Predesk. Drag the freshly decompressed file to this folder.
Close all windows again and re-boot the machine. Next open up the command line again (F12) and type
CONFIGURE CDROMDRIVES 1 and press RETURN twice.
Finally re-boot again and you will see a CD-ROM icon on the iconbar.
Note, this file is only required for the early Panasonic CD-ROM drives which require the little extra interface board.
If you fit a IDE CD-ROM Drive you can disconnect the interface board and connect directly to the IDE cable.