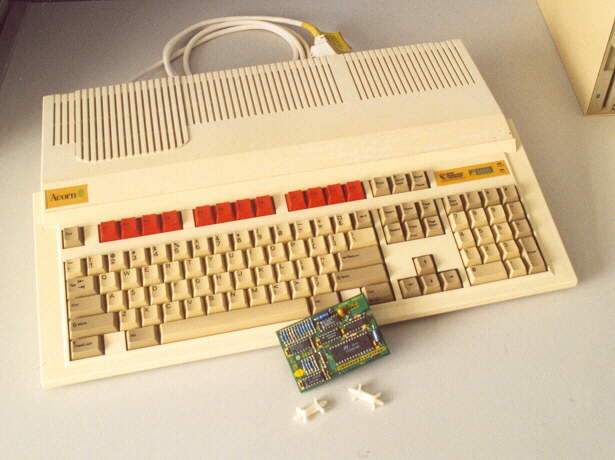
Right, lets upgrade my best A3000 to Econet.
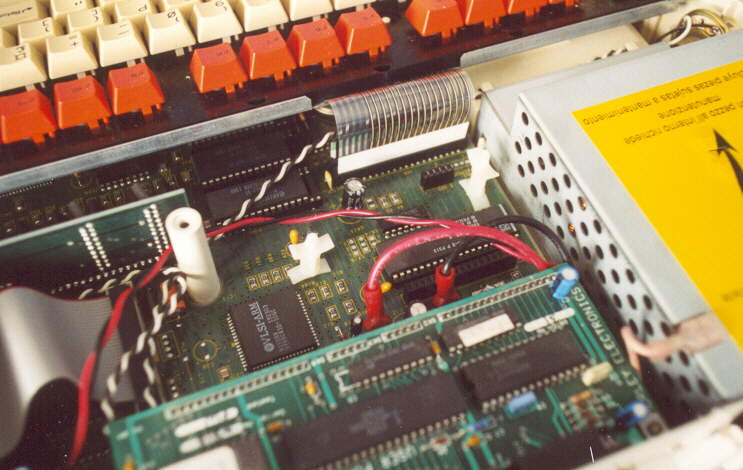
Its about the only thing this machine has room for inside, as you will see in later images.
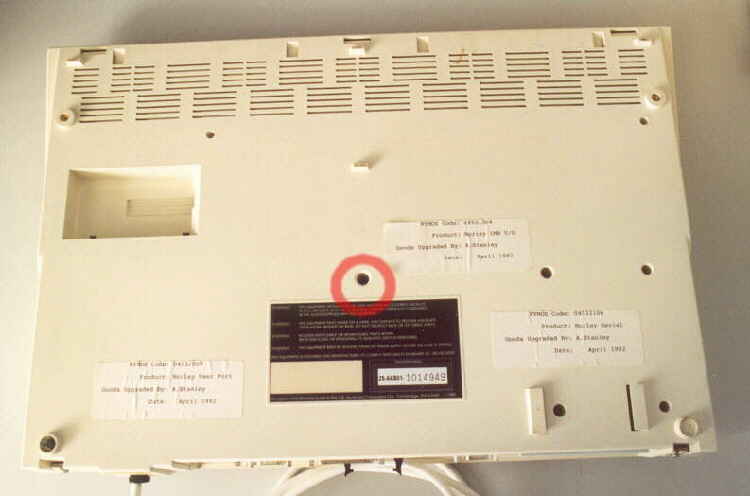
First on the underside, unscrew and remove the single screw highlighted.
Note, the 3 stickers on the base of the machine showing upgrades fitted by Morley and the date, April '92
and the upgraders name! So if you are the A. Stanley give me an email.
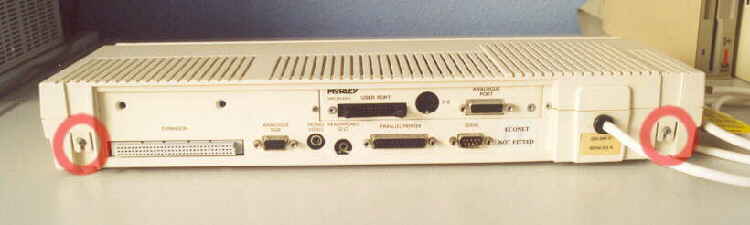
Next, slacken the 2 screws shown and let them drop down and out along with the little securing plates.

Push in the 2 clips and lift upwards to remove the rear of the top cover. The front comes away by getting
the 3 front clips to "ping" out, be careful not to snap anything doing this.
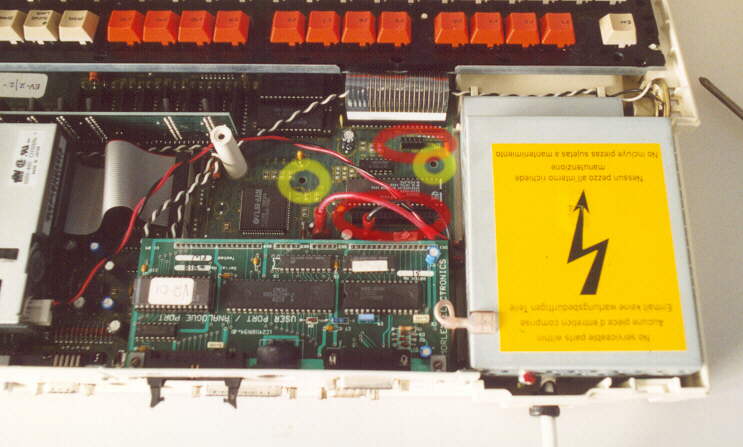
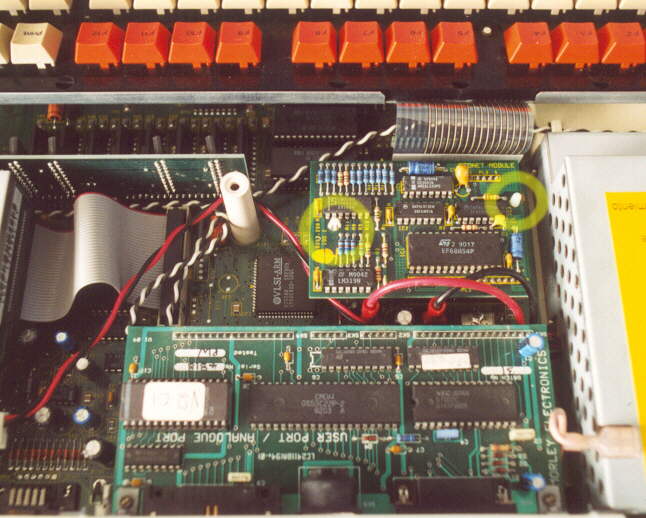
This is gonna be a squeeze, not much room left. The highlights show "yellow" for the support pillar holes
and "red" were the Econet module plugs in.
First take your 2 support pillars and insert them into the 2 holes in the mainboard.
Orientate them as shown. This allows them to miss any surface mount components.
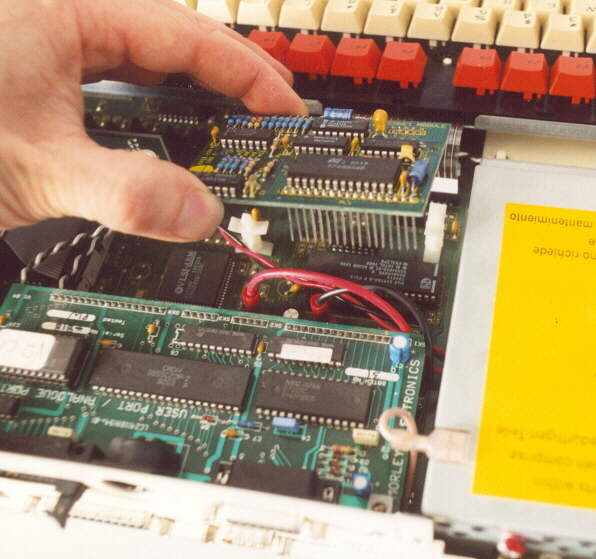
Next, take your Econet module and align the pins on its underside with the sockets on the mainboard.
Push the module down, using pressure ONLY above the pins. It should sink right down into the sockets,
Also make sure that the 2 support pillars poke through the Module and "latch" into place as highlighted.
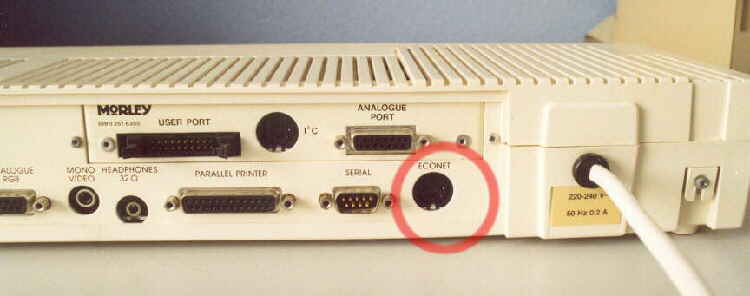
Re-fit the top of the case and remove the blanking sticker that covered the Econet socket.
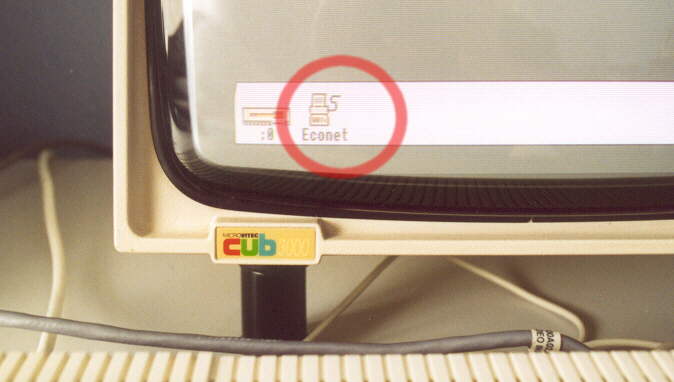
Fire the computer back up and if the upgrade was sussessful then a network icon will appear on the taskbar.
Note, no ANFS rom is required when fitting as all firmware is already present.
Station ID setting will be covered at a later date.