A4 Hard Drive Replacement
Page 1
I have been having trouble for quite some time with the Hard Drive on my A4.
The symptoms started with the drive occasonally not booting at startup, and then not being
recognised at all, with the drive continually seeking and poping up error messages.
Something had to be done, so I bought a second-hand replacement drive of 63Mb from APDL
and the following shows the proceedure for striping down the A4 and preparation of the drive for use.
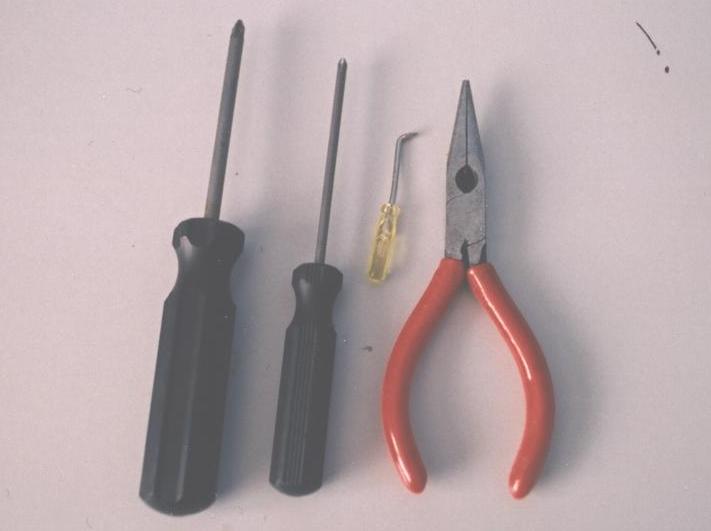
Tools required, from left to right; two pozidrive screwdrivers, 5mm and 3mm in diameter.
A very small and cheap straight edge screwdriver with a bent end to help in lifting ribbon
cable securing clips. And finally a small pair of long nose pliers.
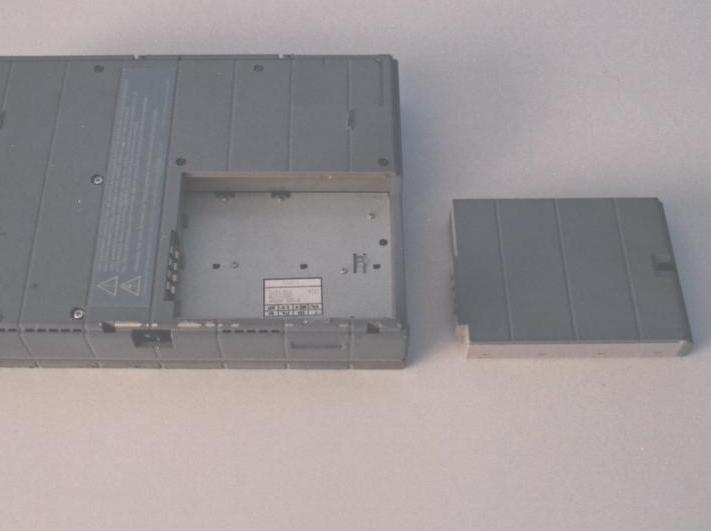
First job, ensure the machine has been turned off, and disconnected from any mains charger supply.
Find a clean working space and remove the battery pack from the underside.
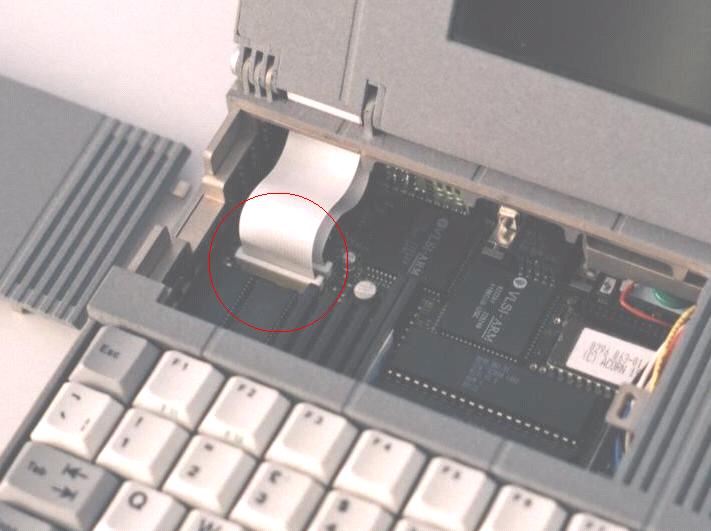
Carefully prise up the econet module blanking plate by hand and remove. Next with the small bent
screwdriver, pull up on the screen ribbon cable securing sockets locking tabs. The tabs will pop
up approx 1mm to release the ribbon cables. Take care with this operation.
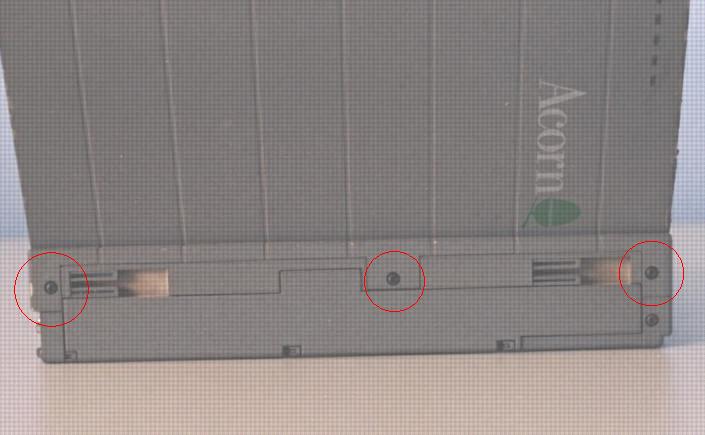
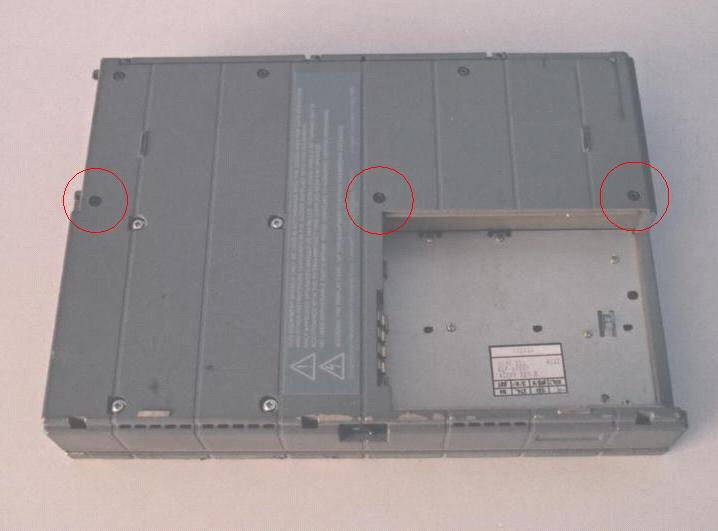
On the rear of the machine, unscrew and remove the three screws highlighted with red circles.
Next turn the machine over and remove the three screws highlighted in the base of the unit.
Holding the case together, turn the machine upright again and open the screen/lid as normal.
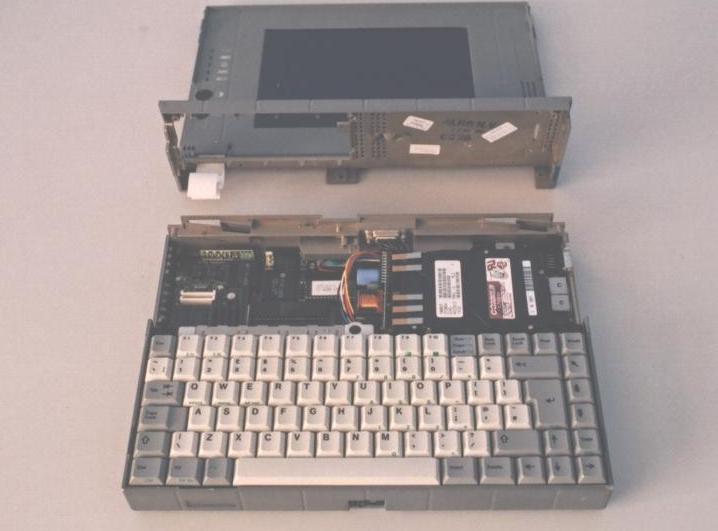
By griping the screen sides and by gently wigglingfrom side to side whilst lifting upwards,
the screen and rear cover/hinge assembly should come free. Lift clear and place it to the side.
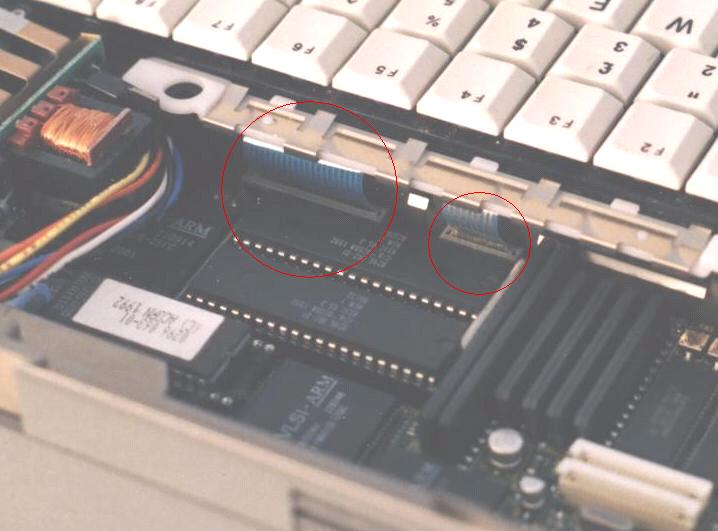
Now the delicate part. Remove the keyboard ribbon cables in the same way as the screen cables.
Be careful, the keyboard cables are not as flexible and a lot easy to damage.
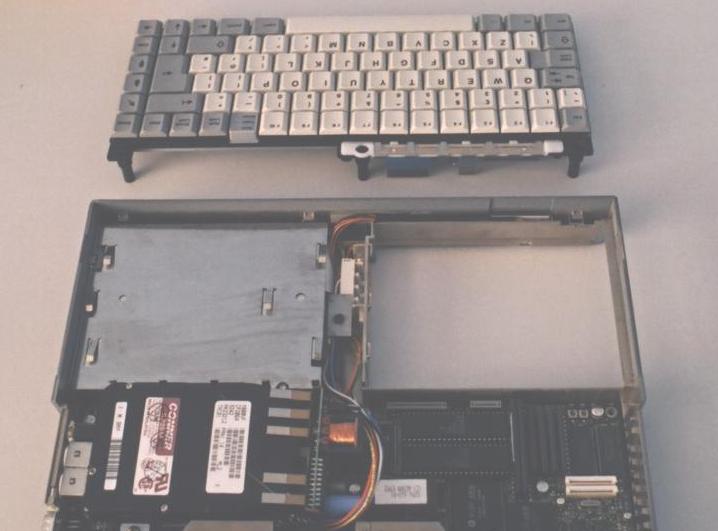
When the cables are detatched, lift the keyboard unit upwards at the rear and a little bit of wriggling
will be required to free the three tabs that secure the keyboard to the front of the case.
Lift the unit clear, ensuring safety of the cables.
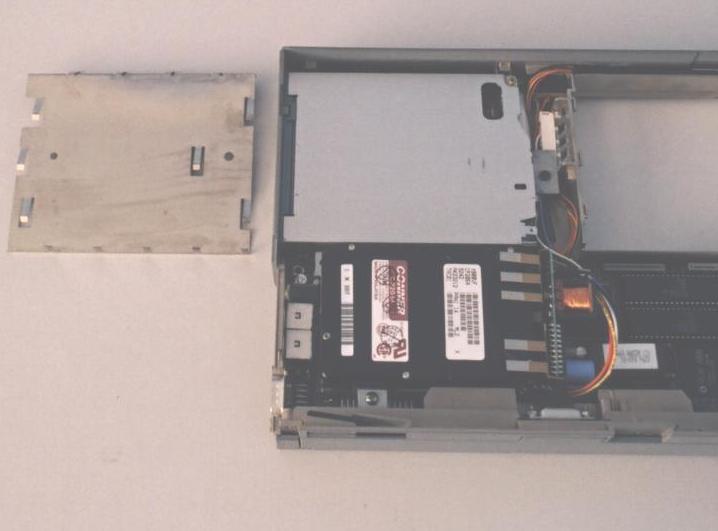
Next we need to remove the floppy drive to be able to remove the hard drives cradle at a later stage.
Lift clear the shielding plate that sits over the drive. Note which way round it came off! (I didn't)
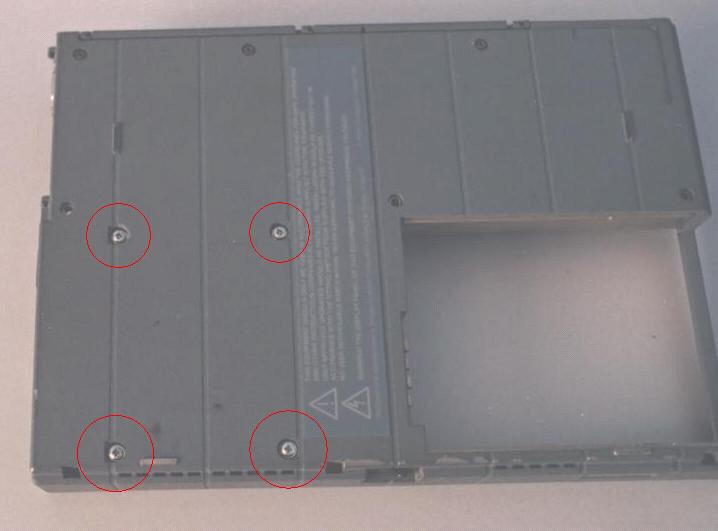
On the underside of the machine, unscrew andremove the four screws highlighted (Red circles)
Put your hand under the machine and support the floppy drive as you turn the case back over.

Now lift the rear edge of the floppy drive upwards, noting that it is secured to the case by a tab of plastic,
more wriggling required. Finally, carefully pull the ribbon cable out of the connector. It is a push fit only.
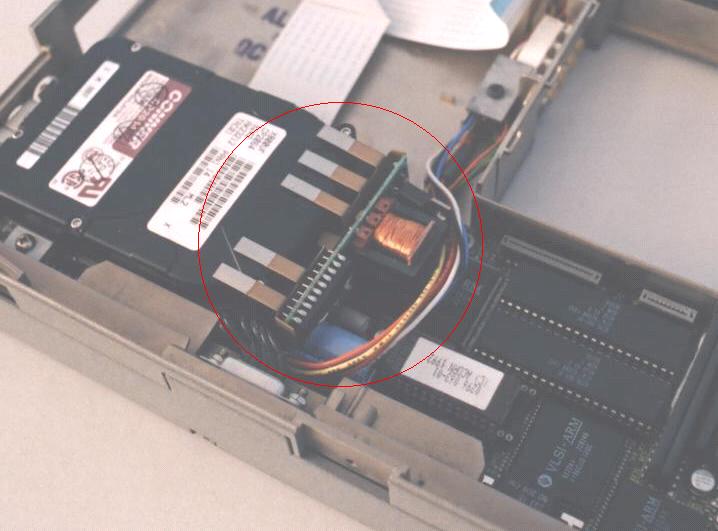
We now need to remove the small upright power board. First grip the shield that seperates the board
from the Hard Drive. It will come out with a slight pull. Then carefully gripthe power board
and pull it from its connector.
Next Page
If you have arrived here from a Search Engine
Click the link below to go to the Classic Acorn Home Page
Everyone else use the Navigation Section on the Left
<---------------------------------------------------
|
|